Introduction to LED Matrix Panels
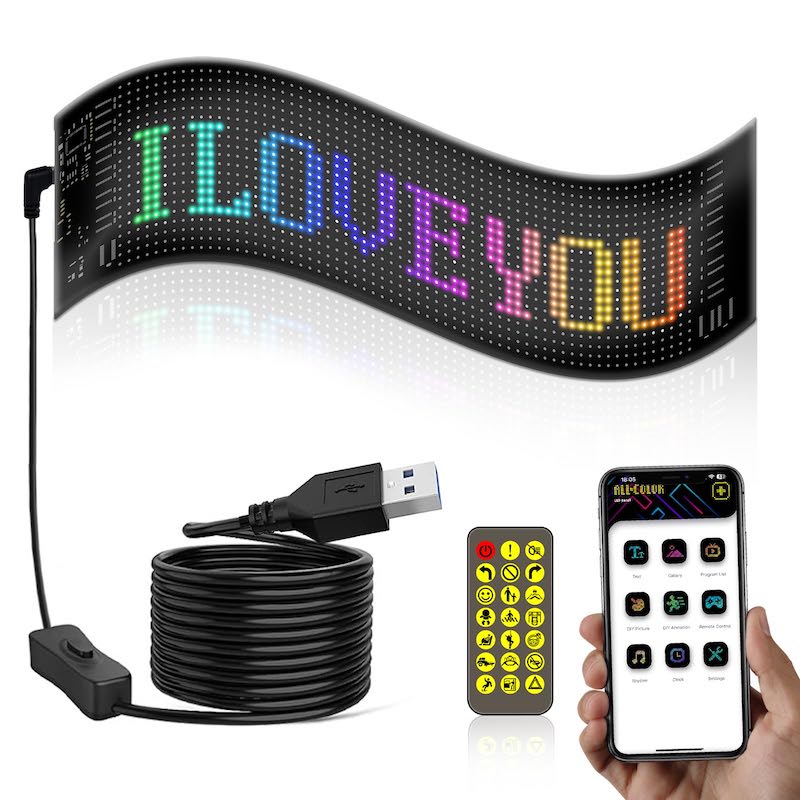
LED matrix panels are at the heart of many glowing, dynamic projects. They consist of grids of LEDs that you can program to display various patterns and animations. These panels are incredibly versatile, enabling creators to bring their visions to life.
With a led matrix panel, you can control each light individually. This means you can create detailed and complex designs. Even better, as a matrix, these lights work together to form a cohesive display, much like pixels on a screen.
The popularity of LED matrix panels has soared due to their flexibility and the advancing technology making them more accessible. Hobbyists and professionals find these panels perfect for a myriad of applications, from creating simple signs to constructing intricate interactive installations.
Understanding how led matrix panels work is the first step in mastering their potential. This includes knowing the basics of their operation, the types available, and how they can fit into your creative projects. So let’s dive in and explore the sparkling world of LED matrix panels, where the possibilities for creativity are as bright as the lights themselves.
Exploring the Applications of LED Matrix Panels
LED matrix panels have a wide range of applications that highlight just how versatile this technology is.
Art Installations and Visual Displays
Artists often use LED matrix panels to create stunning visual displays. These can range from small, intricate pieces to large-scale installations that transform entire buildings or spaces. The ability to program each LED individually allows for detailed animations and effects.
Advertising and Signage Solutions
Businesses leverage the brightness and dynamism of LED matrix panels for advertising and signage. Not just for billboards, these panels can be crafted into custom shapes, making brand logos glow with life and color.
Wearable Technology and Fashion
Innovative designers are embedding LED matrix panels into clothing and accessories, introducing a futuristic twist to fashion. These wearable tech items can display changing patterns or react to sounds and movement, adding an interactive element to the apparel.
Step-by-Step Guide to Building Your Own LED Matrix Panel Project
Getting started with a custom LED matrix panel project can seem daunting at first. However, when broken down into manageable steps, it’s a process that enthusiasts of any skill level can tackle. Follow this guide to take your project from concept to completion.
Selecting the Right LED Matrix Panel
Choosing the correct LED matrix panel is crucial for your project’s success. Consider size, resolution, and color capabilities. Ensure the panel’s specifications match your project’s needs. RGB panels offer full-color displays, while single-color panels are simpler and may be more suited to basic designs.
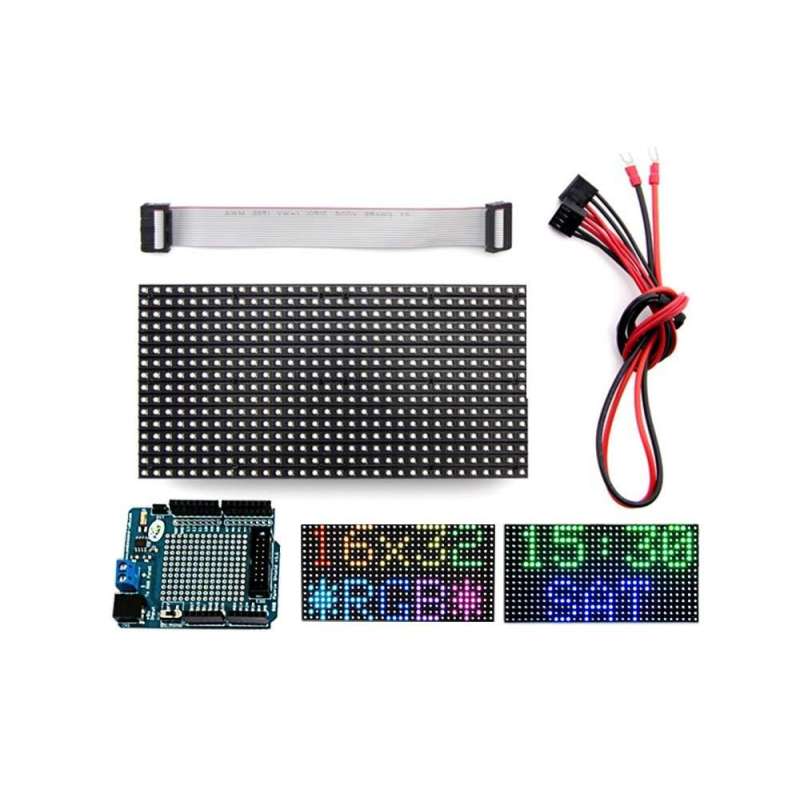
Necessary Tools and Components
Before you start assembling, gather the required tools and components. You’ll need a soldering iron, wire cutters, and a multimeter for basic electronics work. Additional components include a microcontroller, power supply, connecting cables, and mounting hardware. Remember, the quality of your components can greatly affect your project’s final outcome.
Assembly Instructions
Assembly involves connecting all components safely and securely. Start by soldering the LED matrix to the microcontroller following the product’s wiring guide. Next, attach the power supply and test the connections with a simple pattern. Once you’ve confirmed everything is working, secure the matrix into your chosen frame or enclosure. Take care to position it so it best suits your display needs. Safety tip: Always double-check your work to avoid short circuits or other electrical issues.

Programming LED Matrix Panels for Beginners
Entering the programming stage of your LED matrix panel project opens up a world of creativity. Yet, it can be quite a hurdle for beginners. Fear not, with a few basic coding concepts, you’ll be on your way to creating dazzling displays.
Basic Coding Concepts for LED Displays
When it comes to programming a led matrix panel, understanding the basics is key. Here are some simple concepts to get you started:
- Pixel Addressing: Learn how to control individual LEDs (pixels) on the panel, turning them on or off.
- Color Values: Know how to set colors using RGB (Red, Green, Blue) values to mix the shade you need.
- Loops and Conditions: Utilize loops for repeating patterns and conditions to change display based on inputs or events.
- Frame Buffering: Use buffers to hold the upcoming frame while the current one is displayed, for smooth transitions.
These concepts form the foundation of programming your LED matrix panel. Start by trying them out with simple patterns like a blinking dot or a scrolling line.
Popular Libraries and Frameworks
Next, you need to know about the tools that can make programming easier. Many libraries and frameworks are available for led matrix panels. These tools come with pre-written code that you can use to control the panels. Here are some commonly used ones:
- Adafruit’s NeoPixel: A widely used library for individually addressable RGB LEDs.
- FastLED: A powerful library designed for LED strips and matrixes, offering advanced features.
- Arduino’s LEDcontrol: A go-to for beginners using Arduino to create LED projects.
You don’t have to start from scratch with these libraries. They come with examples that you can modify for your project. Check the documentation and try out example codes. Before long, you’ll add your own touch to them.
With these coding basics and handy tools, you’re well on your way to programming your own led matrix panel. Don’t stress over getting it perfect the first time. With practice, your confidence and skills will grow.
Interactive LED Matrix Panel Projects
LED matrix panels are not just for visual displays; they can be interactive too. This interactivity can engage audiences in unique ways, whether through games or interactive art installations. When designing these interactive projects with a led matrix panel, creators open up a world of exciting possibilities.
Creating Games with LED Panels
Transform your led matrix panel into an interactive gaming platform. Simple games like ‘snake’ or ‘tetris’ can be programmed, bringing a retro feel to modern technology. Here’s how to get started:
- Choose Your Game Concept: Start with a simple game that doesn’t require complex controls.
- Design the Game Logic: Program the basic rules and how the LED panel will display the game state.
- Input Methods: Decide on how players will interact with the game. Attach buttons or use motion sensors.
- Debug and Test: Make sure the game works as intended by thorough testing.
Creating games with LED panels not only adds a fun element to your project but also helps in learning the intricacies of led matrix panel programming.
Designing Interactive Art Pieces
LED matrix panels offer a canvas for creating art that responds to the environment or audience. Some ideas include:
- Sound-Reactive Displays: Design visuals that change with music or ambient sound.
- Motion-Triggered Animations: Use sensors to alter the display when people move nearby.
- Touch-Interactive Canvas: Create a piece that changes as viewers touch or interact with the surface.
The key to success with interactive art is to test and iterate. Pay attention to how people interact and refine the experience based on their responses. This not only enhances the appeal but also the overall impact of your led matrix panel art. Interactivity in art can transform passive viewers into active participants, adding a new dimension to the experience.
Advanced Techniques for LED Matrix Displays
Taking your LED matrix panel projects to the next level involves mastering some advanced techniques.
Incorporating Sensors and Other Inputs
To create responsive and dynamic displays, consider adding sensors and other input devices to your led matrix panel. Motion sensors can trigger changes in the display as people move past. Light sensors can adjust the brightness based on the room’s lighting conditions, conserving energy and creating a better viewing experience. Adding touch sensors can turn your display into an interactive surface, ideal for public installations or personal projects that invite user interaction.
Optimizing Performance for Large-Scale Displays
Large-scale led matrix panel displays require careful planning to maintain high performance. Start by selecting high-quality components that can withstand the demands of continuous operation. Design your circuit to minimize power loss and ensure even distribution of electricity across the entire panel. Use efficient coding practices to streamline the processes running on your microcontroller. This means optimizing loops and minimizing delay functions.
When you’re looking to scale up, efficiency becomes key. Consider using techniques like multiplexing to control large numbers of LEDs with fewer pins on your microcontroller. Plan for maintenance by designing your system in modular sections that can be easily replaced or repaired. By adhering to these practices, you will ensure your large-scale installations run smoothly and captivate audiences with their flawless performance.
Real-World Examples of LED Matrix Panel Creations
The applications of LED matrix panels are not limited to theoretical projects. Real-world examples showcase their incredible potential and versatility.
Successful Crowd-Funded LED Projects
In the realm of crowdfunding, LED matrix panel projects have gained significant traction. Many creators turn to platforms like Kickstarter and Indiegogo to fund their imaginative LED concepts.
- One notable success story is a modular LED matrix kit that lets users build custom displays. It raised funds well beyond its goal, thanks to its user-friendly approach and versatile functionalities.
- Another project featured a wearable LED matrix panel that syncs with music. It resonated with festival-goers, quickly surpassing its funding targets.
These projects highlight consumer interest in innovative LED technology and demonstrate how crowd-funding can kickstart creative ventures.
Renowned Art Pieces and Exhibitions Featuring LED Panels
LED matrix panels have illuminated the world of art, creating mesmerizing experiences.
- A notable exhibition featured an interactive LED floor that changed patterns as visitors walked over it. It became the highlight of the show.
- Another acclaimed artist created a vast LED ceiling display that mimicked the night sky. Viewers were captivated by the shifting constellations and nebulae.
Such installations have not only won critical acclaim but have also advanced the public’s appreciation for the fusion of technology and art.
Resources for LED Matrix Panel Enthusiasts
Finding resources and support can make a massive difference in your LED matrix panel projects.
Online Communities and Forums
For beginners and seasoned pros alike, online communities and forums are treasure troves of information.
- Join forums specific to LED matrix panels to ask questions and share successes.
- Look for subreddits centered on electronics and LED technology for inspiration.
- Participate in maker and hobbyist groups on social media to find project ideas.
These platforms allow for knowledge sharing, troubleshooting, and networking with like-minded individuals.
Shops and Suppliers for DIY Project Components
Sourcing quality components is essential for any successful LED matrix panel project.
- Search for retailers that specialize in electronic parts and maker supplies.
- Use online marketplaces that offer a range of components from various vendors.
- Don’t overlook local electronics shops for hands-on support and immediate supply needs.
Always check reviews and ratings to gauge the reliability of the shops and suppliers. This helps ensure you get the best parts for your project.